
Most homeowners dread dramatic plumbing disasters: the sudden, catastrophic burst pipe that floods a hallway in minutes. However, the far more expensive reality of water intrusion is almost always slow, silent, and entirely unseen. It is the pinhole drip hidden behind your drywall, warm air condensing on cold metal inside ductwork, or groundwater steadily seeping through porous concrete foundation walls. By the time a visible water stain finally blooms on your ceiling or baseboard, the underlying moisture has likely been degrading structural framing, ruining insulation thermal resistance values, warping expensive wood finishes, and silently compromising indoor air quality for months. Identifying these issues requires paying close attention to subtle sensory red flags that most people overlook. A musty odor in a closet, paint peeling near baseboards, unexplained spikes in utility bills, or windows fogging on the inside are early indicators of trapped moisture. Consider using a systematic, top-to-bottom inspection and prevention plan. We will walk through evaluating your exterior envelopes, sealing foundations, maintaining mechanical systems, and protecting interior surfaces. By implementing these strategies and establishing a rapid-response protocol for emergencies, you can stop concealed moisture in its tracks before it escalates into a devastating financial burden.
Fortifying Your Roof, Attic, and Upper Envelope

To keep your home dry, look upward first. Water rarely enters straight through the middle of an intact roof field. Instead, it systematically penetrates vulnerable transitions across your roofline. The perimeters around chimneys, skylights, dormers, and cracked neoprene rubber boots covering vent pipes are the primary culprits. Severe weather easily lifts shingles or dislodges the critical step flashing meant to shed water away from joints. After a major storm, conduct a ground-level inspection using binoculars. Look for lifted shingles, missing granules in gutters, and rusted flashing. If you notice structural vulnerabilities before wind-driven rain saturates your roof decking, bring in roofing contractors to perform infrared moisture scans or physically lift and replace suspect flashing.
Below the roof deck, the attic represents another major battleground against moisture, driven by poor ventilation. The physics of winter “attic rain” and summer humidity buildup are destructive. Warm, moist household air rises and escapes through unsealed recessed lighting fixtures and drafty attic hatches. When this humid air hits freezing cold roof sheathing in winter, it condenses into liquid water, raining onto your insulation. To prevent this, balance your ventilation system.
- Verify your blown-in insulation is not blocking perforated soffit intake vents at the eaves.
- Confirm bathroom and kitchen exhaust fans are properly ducted through the roof to terminate outdoors, rather than dumping humid air into the attic cavity.
- Seal gaps around wire penetrations, plumbing stacks, and ceiling light fixtures with expanding foam to stop warm indoor air from migrating upward.
- Ensure your ridge vent at the peak is clear of debris so rising heat naturally exhausts itself without trapping condensation.
Controlling Groundwater Around Foundations and Below-Grade Spaces
Moving down to the base of your home, managing the flow of groundwater is critical for keeping below-grade spaces dry. The most fundamental step is applying the “six-inch in ten-foot” rule to the soil surrounding your home. Ensure grading slopes visibly away from the foundation perimeter, dropping at least six inches over the first ten feet. This gravitational advantage prevents rainwater from pooling against masonry walls and finding its way through tiny structural cracks. Furthermore, actively manage roof runoff. Install rigid downspout extensions or buried pop-up emitters to carry the massive volume of water collected by your roof well past the backfill zone. Clear leaf debris from your gutters twice a year to prevent overflow from cascading down exterior walls. Severe root intrusion and collapsed yard lines can back up stormwater toward basement walls. When persistent pooling occurs despite proper grading, you may need local drain services to perform camera inspections and hydro-jetting to clear blockages.
Beneath the house, uncovered soil in a dirt-floor space releases gallons of water vapor daily through capillary action. This upward vapor drive eventually saturates floor joists and subflooring from below, leading to rot. You must encapsulate exposed earth.
- Lay down a heavy-duty 12-to-20-mil cross-woven polyethylene vapor barrier over the entire soil surface, running it up the foundation walls and sealing all seams with waterproof tape.
- Close and seal exterior foundation vents in humid climates where drawing outside air under the house introduces more moisture than it removes.
- Insulate perimeter rim joists with closed-cell spray foam to prevent outdoor humidity from condensing on cold framing.
- When standing water or high subfloor moisture readings persist, reach out to crawlspace services to have interior French drains, sump pumps, and commercial-grade dehumidifiers professionally installed.
Safeguarding Concealed Plumbing and Water Supply Systems

While exterior weather is a well-known threat, the pipes coursing through your walls pose an equally severe risk of concealed moisture damage. High-failure points are often hidden out of sight, including degrading rubber washing machine hoses, brittle plastic refrigerator ice-maker lines, aging toilet supply valves, and worn PEX or copper fittings. Proactively replace braided stainless steel appliance hoses every five years, as internal rubber bladders degrade over time despite looking fine externally. A highly effective way to catch a silent slab leak or running valve is performing a simple overnight water-meter check. Before bed, ensure all fixtures are turned off, then record the exact numbers on your water meter dial. Check it again first thing in the morning; movement indicates a leak in your pressurized system. Additionally, residential water pressure exceeding 80 psi accelerates pinhole leaks and valve failures. Scheduling periodic pressure-regulator tests with plumbing contractors ensures your municipal supply isn’t putting undue stress on your internal network.
Water chemistry also dictates moisture risk. Hard water minerals aggressively corrode water heater tanks from the inside out and calcify shutoff valves, causing them to seize entirely during emergencies. Unconditioned basements and utility closets present another issue: cold-water pipes sweat heavily during the summer when ambient humidity touches chilled metal.
- Wrap exposed cold-water lines in unconditioned spaces with closed-cell foam insulation sleeves, taping the joints to prevent condensation from dripping onto drywall.
- Flush your water heater annually to remove sediment buildup that compromises structural integrity and causes premature failure.
- Consult with reputable water treatment companies to accurately size and install whole-home water softeners and filtration systems, which will extend appliance lifespans and protect internal rubber seals from mineral abrasion.
Managing Indoor Humidity and HVAC Air Pathways

A structurally sound exterior and leak-free plumbing system are only part of the equation; you must aggressively manage invisible moisture suspended in your indoor air. Maintaining an indoor relative humidity between 35 percent and 50 percent is crucial. Placing inexpensive digital hygrometers on each floor allows you to continuously track these levels. When relative humidity consistently rises above 55 percent, the air reaches a dew point that triggers widespread condensation on cool surfaces, from window glass to the drywall surrounding air conditioning vents. Your air conditioning system naturally removes humidity, but this process generates gallons of wastewater. Establish a seasonal maintenance routine of pouring white vinegar down the AC condensate drain line to kill algae and prevent clogs. Always inspect the secondary overflow pan beneath the unit for rust or standing water. Warning signs like a short-cycling compressor, frozen evaporator coils, or pooling water around the air handler mandate immediate attention. Delaying HVAC repairs will eventually lead to an overflowing drain pan that catastrophically floods ceilings or floors beneath the unit.
The ductwork distributing air throughout your home must remain clean and tightly sealed. Unsealed sheet-metal plenums and torn duct insulation in humid, unconditioned spaces create a perfect environment for severe sweating, leading to chronic dripping.
- Apply thick mastic sealant to all accessible duct joints and air handler connections to eliminate conditioned air leaks.
- Upgrade to MERV 11 through MERV 13 pleated filters, changing them strictly every 60 to 90 days to maintain proper airflow and prevent dust buildup on cooling coils.
- Keep return vents clear of furniture and drapes to ensure your system can pull enough air to dehumidify the space.
- Recognize that thick layers of matted dust and pet dander inside ductwork naturally retain ambient humidity. Following major renovations, hiring professional duct cleaning services removes dense debris traps and normalizes internal air pathways.
Protecting Subfloors and Finished Interior Surfaces
When hidden moisture eventually reaches your living spaces, expensive interior finishes, particularly wood and laminate flooring, are the first materials to suffer irreversible damage. Trapping residual, unseen moisture beneath a newly installed finish causes long-term structural failure. Months later, trapped moisture will cause hardwood planks to cup, crown, or buckle, while synthetic planks experience delaminated adhesives. To avoid this, utilize a pinless moisture meter before putting down any new material. This non-destructive tool allows you to accurately compare the moisture content of your subfloor against strict manufacturer tolerances required for your specific finish. For traditional wood subfloors, readings should typically register well under 12 percent, with no more than a 2 to 4 percent variance between the subfloor and the new flooring material.
Homes built on concrete slabs or featuring below-grade basements require an even more stringent approach to vapor management. Concrete acts like a dense sponge, continuously wicking moisture from the earth upward into your home.
- Conduct a 24-hour plastic-sheet moisture vapor test on any bare concrete slab before finishing the space by taping plastic to the floor and checking for condensation.
- Select waterproof rigid-core luxury vinyl or porcelain tile rather than solid hardwood for any basement or slab-on-grade room, as these materials will not warp when exposed to concrete vapor emissions.
- Always ensure hardwood and engineered wood planks acclimate inside the exact room where they will be installed for a minimum of 72 hours with the HVAC system running normally.
- When outsourcing interior renovations, carefully vet flooring companies that actively document subfloor moisture readings on their estimates and rigidly adhere to installing heavy-duty polyurethane underlayment vapor barriers over concrete.
Rapid Detection, Emergency Drying, and Safe Cleanup
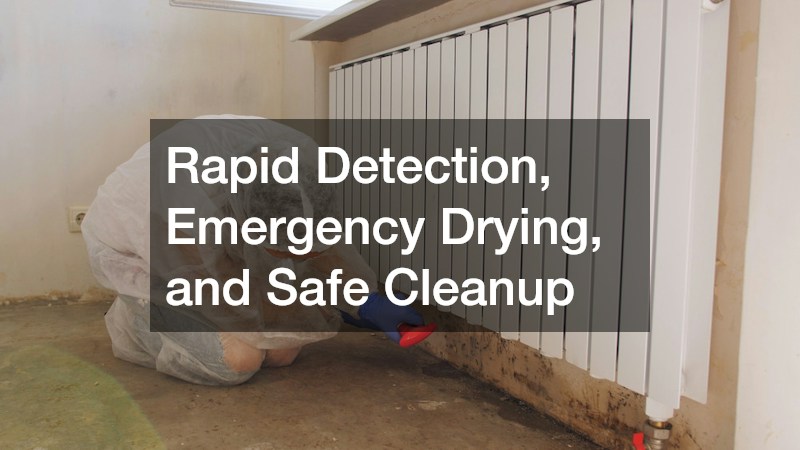
Even with meticulous maintenance, unpreventable accidents and sudden appliance failures happen. When water escapes its intended path, rapid detection dictates whether you face a minor inconvenience or a massive reconstruction project. Placing smart, Wi-Fi-enabled leak sensors under high-risk appliances—such as dishwashers, water heaters, washing machines, and bathroom vanity traps—is one of the best investments you can make. Pairing these sensors with an automatic shutoff valve ensures the supply is severed immediately. Once a leak occurs, you work against a critical 24-to-48-hour drying window. Immediately cut power to wet zones at the breaker box, extract standing water using a wet vacuum, and deploy high-velocity air movers. Pull away baseboards and drill small weep holes in the drywall to let wall cavities breathe. If saturation penetrates deep into wall insulation, wicks high up the drywall, or seeps into multi-layer subfloors, domestic fans will not suffice. This level of intrusion requires commercial intervention from certified water damage companies equipped with thermal imaging cameras to map the invisible moisture footprint and large desiccant dehumidifiers to pull bound water out of structural wood.
If a hidden leak goes unnoticed for weeks, microbial growth is highly likely. Handling porous materials safely is paramount to prevent spreading the problem.
- Never scrub porous, unpainted drywall with liquid bleach; bleach is mostly water and simply adds moisture to the environment without killing embedded root structures.
- Avoid running standard box fans directly over visible fungal colonies, as this instantly aerosolizes millions of microscopic spores, spreading contamination throughout the house.
- For minor surface spots covering less than ten square feet on non-porous tile, use a simple solution of dish soap, warm water, and physical agitation to clean safely.
- For hidden contamination discovered behind cabinetry, beneath ruined carpets, or within saturated insulation, quarantine the room and bring in certified mold remediation services to establish negative air pressure containment chambers and deploy HEPA-filtered air scrubbers before demolition begins.
Protecting a home from the insidious threat of hidden water intrusion is rarely about funding massive, expensive overhauls; it comes down to adopting consistent, proactive seasonal habits paired with timely specialist support when necessary. Shifting your mindset from reactive panic to preventative maintenance is the most effective way to safeguard your property. You can drastically reduce your risk by acting on a few fundamental pillars starting this weekend. Walk your exterior perimeter after heavy rain to verify downspouts are carrying water away from the foundation. Keep a close eye on your indoor relative humidity levels as the seasons change, and take a flashlight to thoroughly inspect the supply lines hidden underneath your kitchen and bathroom sinks. Finally, strategically place inexpensive leak alarms in the highest-risk zones around your major appliances. Catching intrusive moisture while it is a manageable maintenance task not only protects the critical structural integrity of your investment but also secures the long-term respiratory health of everyone living under your roof.